Busbars for LFP or LiFePO4 batteries are usually consisting of a copper strip with two holes. Do never use these strips in a mobile environment with exclamation marks, always apply braided copper connectors. In the end, vibrations will always loosen the fasteners, with fire as a result. This aspect is totally underrated, I cannot stress this enough, just like applying the proper torques. Contact resistance is the magic word here.
It is relative easy to make a flexible cable, connector, based on braided copper. The pro’s: It is very flexible, able to transport high currents, create “shortest distance” connections (voltage drop!), reliable and relative easy to make and, finally, it is easy to combine with busbars. Understanding the process is controlling the process.
Table of Contents
Techniques
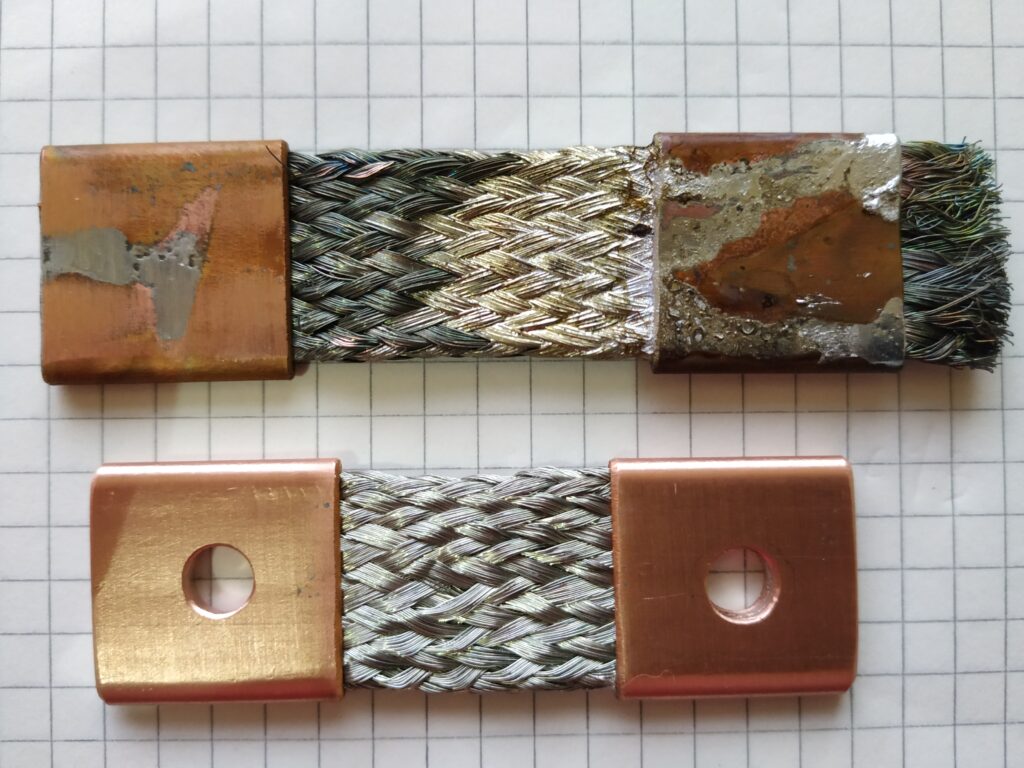
This illustration is about two extremes…
DIY
By example… What you see is copper tube with wall thickness 1 mm and outside diameter 15 mm. The tube is half hard watertube, containing 99.9% copper, probably contaminated with a bit phosphor, increasing the resistance by ~ 20%. The sleeve has a width of 22 mm and has a current surface of 16 mm2 as specified. After controlling, it turned out to be 19 mm2. This was done by measuring the length, the mass and calculating it by using the known density of copper.
This is the video of the soldering:
But, let’s start at the beginning…
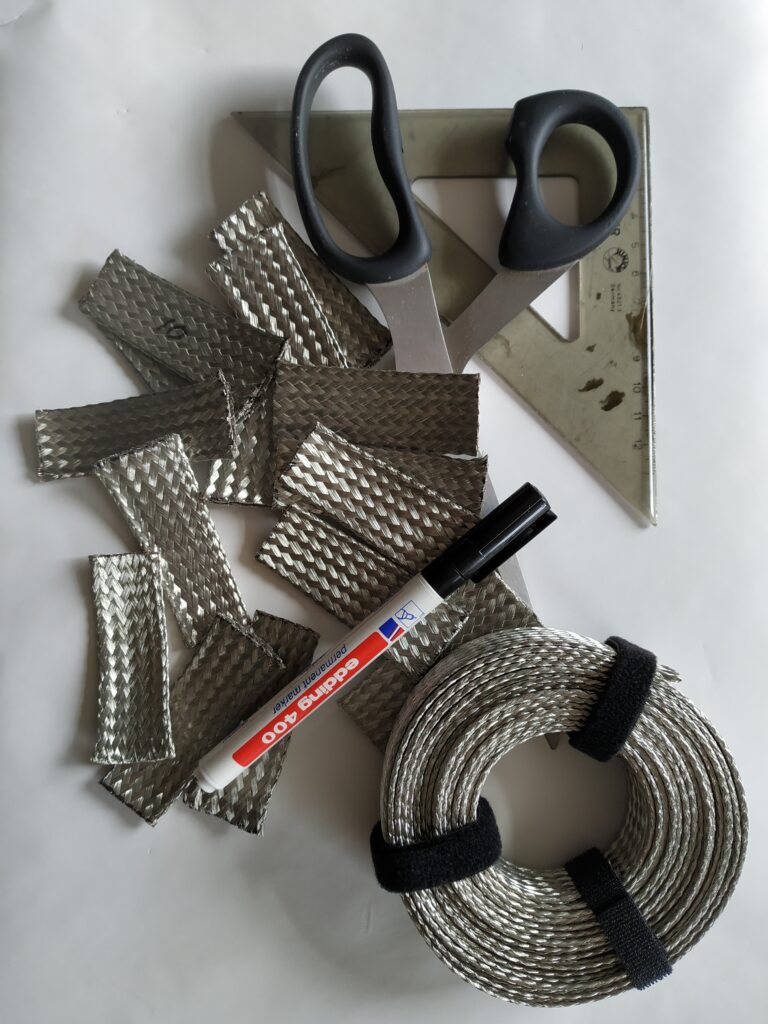
First you cut the copper braid to size.
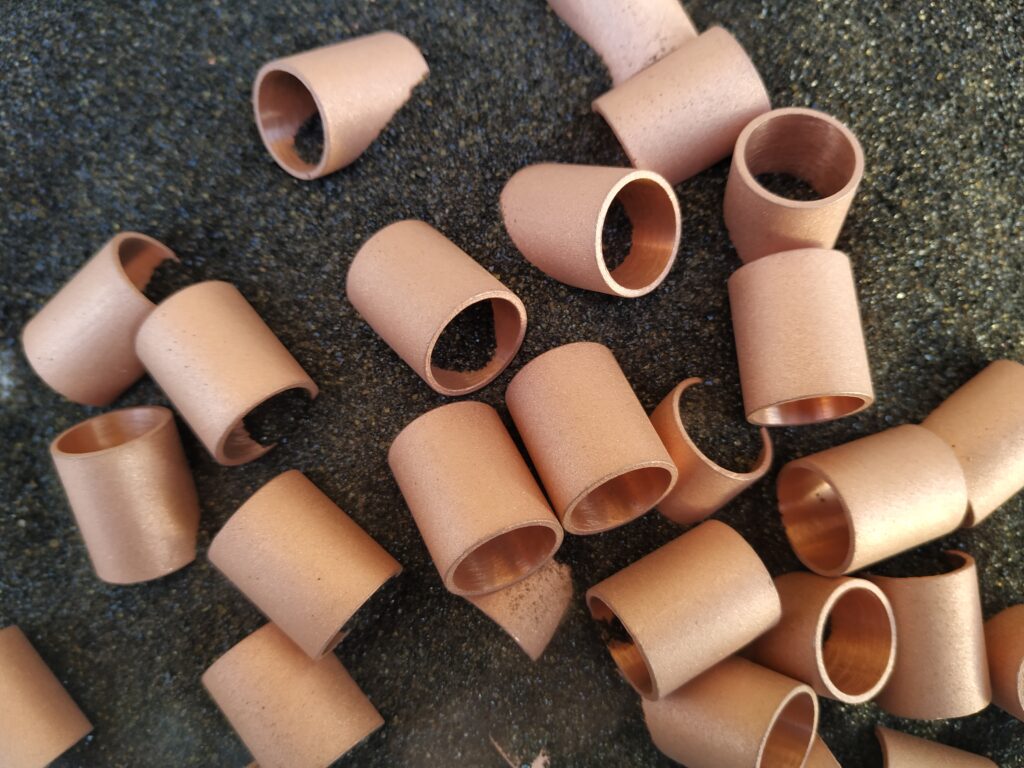
You make the end pieces from copper tubing. An electric cross-cut saw with a stopper is handy. You can use sandpaper to clean everything thoroughly. I use a glass jar with a threaded rod in the lid in combination with a cordless drill. Hence the black glass grit.
You slide the copper pieces of tube over the braid.
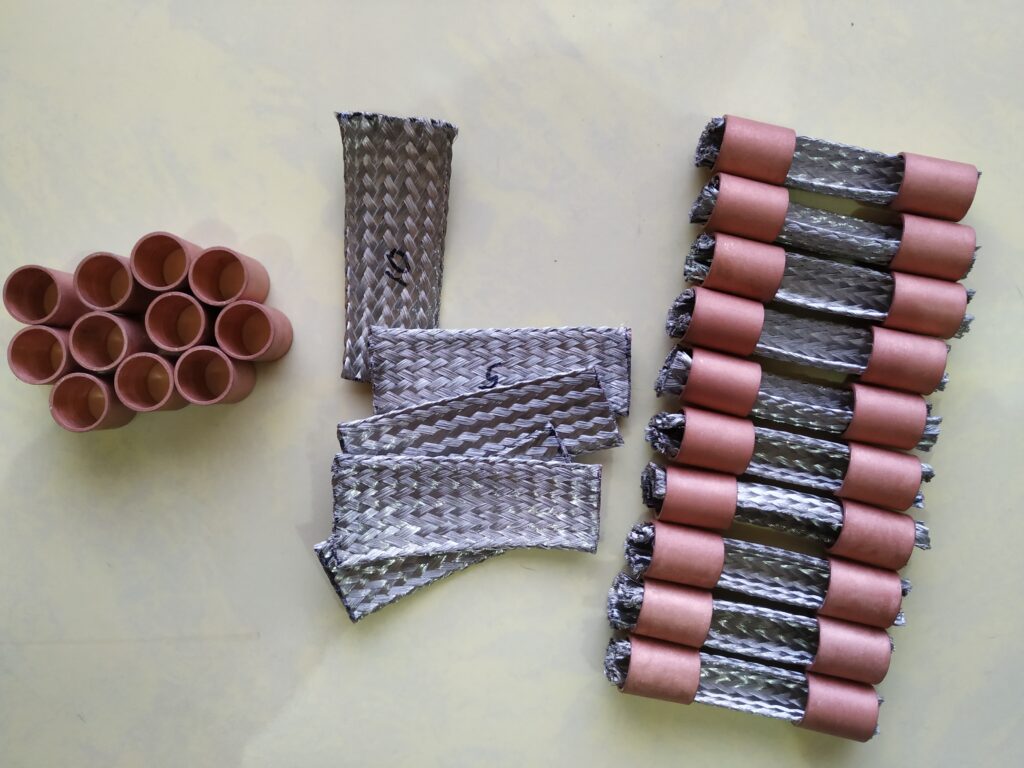
Then you press the tubes together in two steps. A vice is a good tool for this. Phase 1 consists of pressing together so that the braid can still be moved.
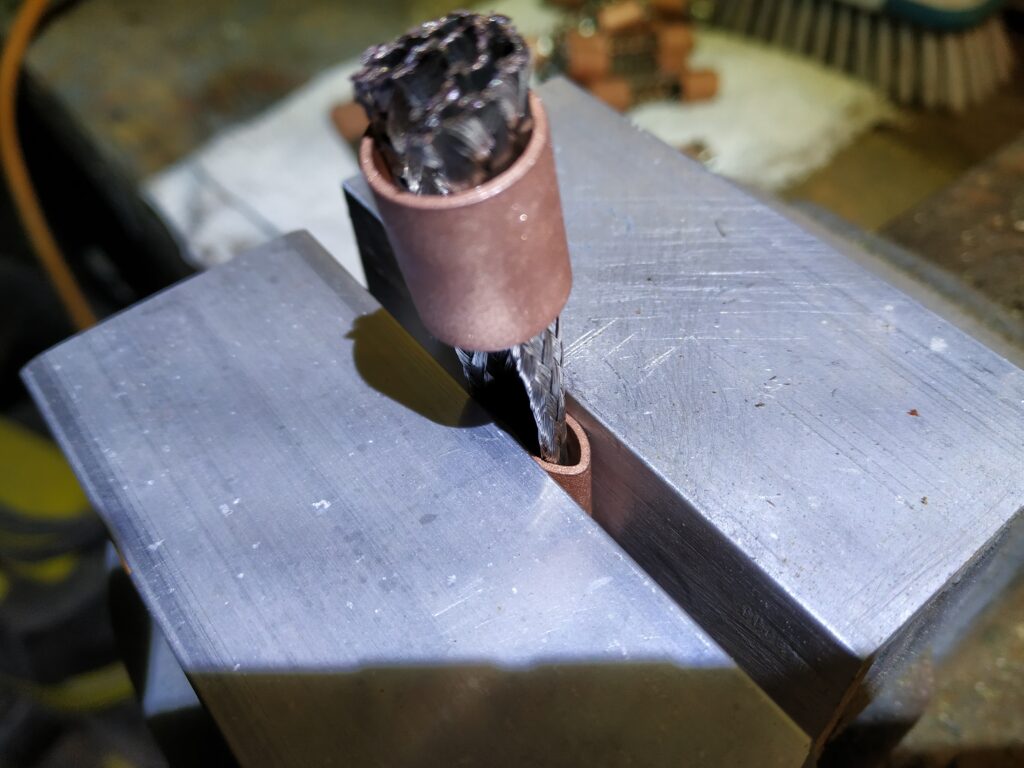
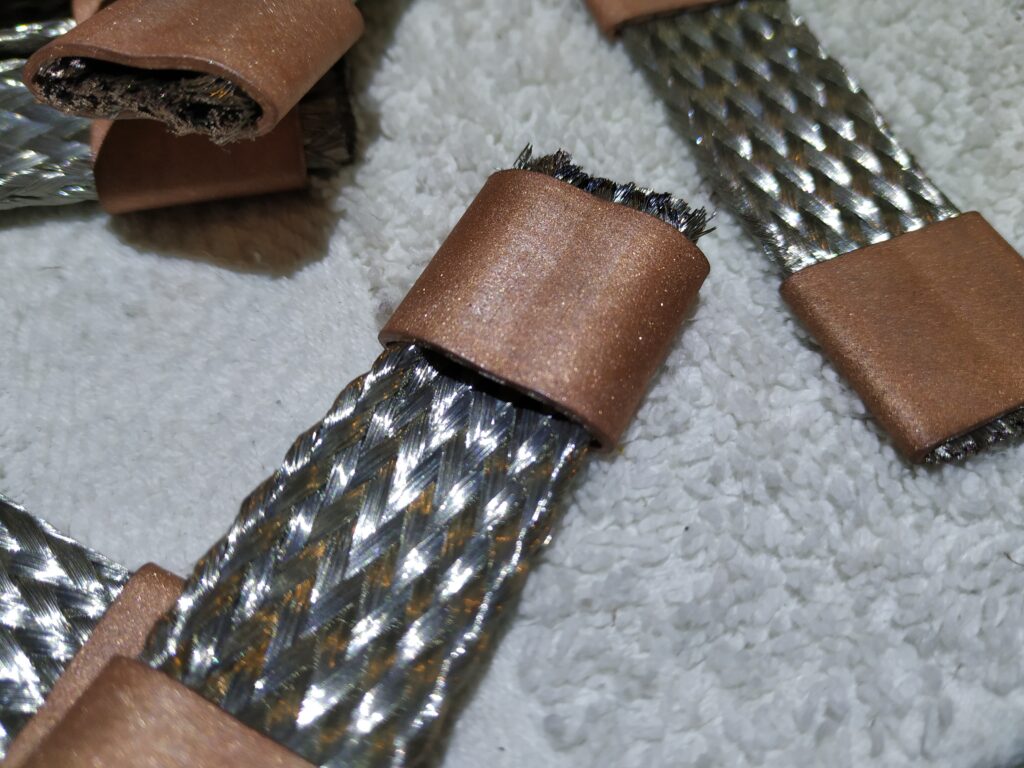
Make sure that the braid is well spread across the width of the tube. Phase 2 consists of clamping the braid completely together in the tube. For this, use a lot of force in combination with a heavy vice.
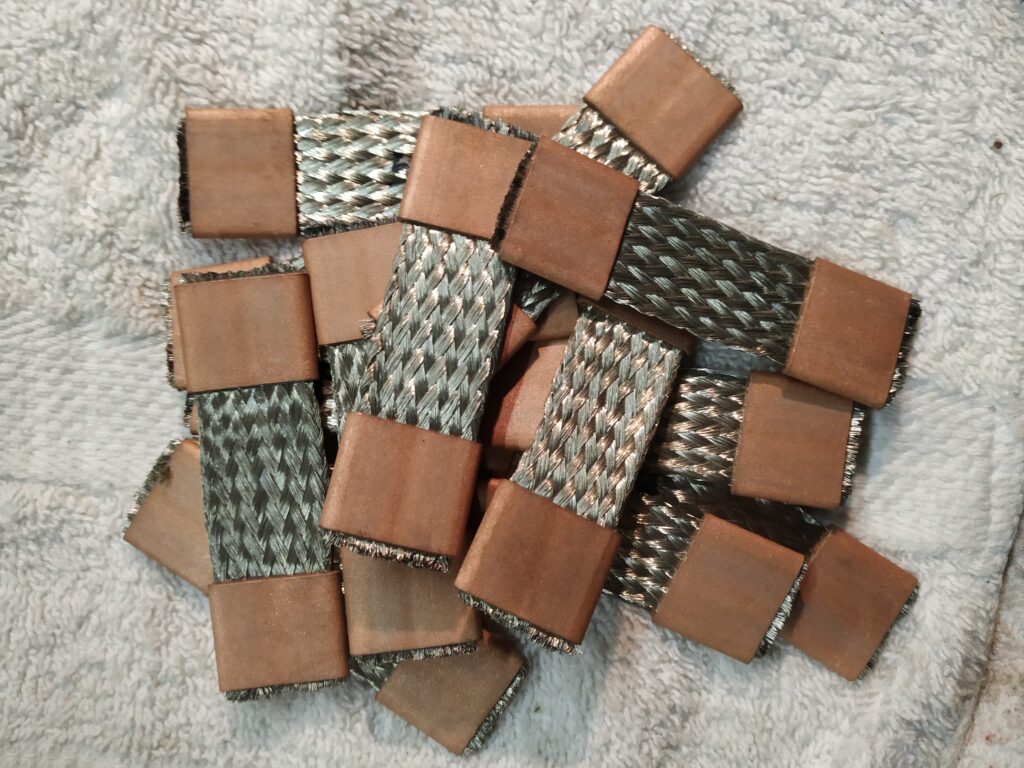
Copper braid works like a sponge – capillary effect. It is also used to remove solder from printed circuit boards. The first photo illustrates that it quickly gets into the flexible braid. You always want to prevent that. That is why you should always add solder to the cut ends. Make sure you spread it evenly across the width:
- It fills up completely between the hole and the inner edge – and no further for maximum flexibility, i.e. very short connectors.
- It fills up completely, visible at the inner edges to obtain maximum corrosion protection, i.e. longer connectors.
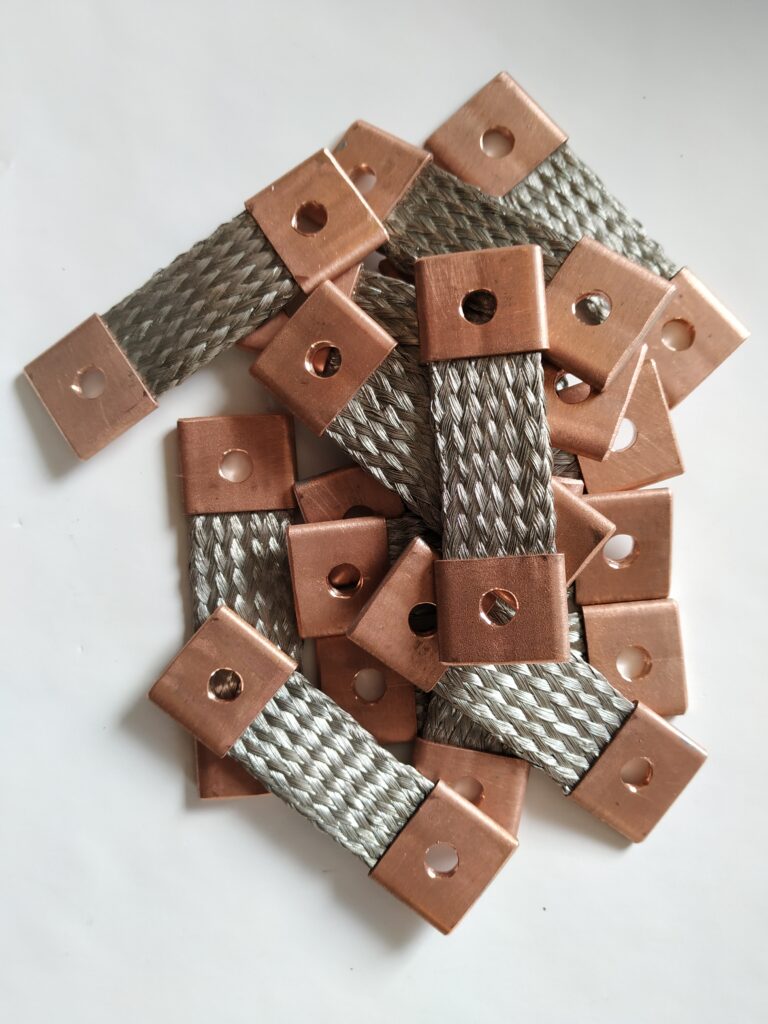
Of course, you first heat the ends with, for example, a small propane torch. Make sure that it does not get too hot. You will see the discolouration of the threads and that is not good.
If you can choose between copper braiding or tinned copper braiding, choose the latter.
Example
Troubleshooting
The solder just won’t get in
Several causes are possible. Some examples:
- The copper is not clean.
- You made the object too hot.
- Flux is not doing what it should do.
- Solder is of bad quality.
- Strands clog the capillary openings
Solutions:
- Use sanding paper to remove oxides, etcetera.
- Heat the object and test with the solder if it becomes liquid. Cycle this process in order to limit heating.
- If you have trouble with flux (rosin core solder), you may want to try flux “fat”. But apply very (!) sparsely only on the cut edge of the braid. Unfortunately there is not much to find on the net but my guess is that the fat is stearin based, which is okay for soldering, possibly mixed with salts, which is not okay. Hence sparsely. More general: Never use chloride based fluxes containing for example hydrochloric acid (like S39).
- Do yourself a favour and use good old tin-lead (60/40) solder.
- Use scissors to trim the strands, grind only after soldering to avoid clogging.
The solder comes out at the bottom
For a 15 mm outside diameter tube, I align 2 mm diameter solder wire over the edge. It melts and is absorbed, sucked in, without moving the solder wire. I repeat that and that is it.
So don’t add too much and apply evenly.
Corrosion
In critical environments, make sure solder flows properly and completely.

More…
- Electrical resistance of the car body
- Rear-view mirror on smart phone
- Labora: Mirrors, camera’s and security
- Video camera’s evaluated
- Flexible braided copper connectors
- Labora: Mobile energy accounting
- Hoe werkt een automatische schakelaar voor accu’s?
- Labora: Dealing with power hungry virtual machines
- Engine oils
- Motorolie
- DEF-tips (AdBlue)
- Labora: Credits en links, “Hall of Fame”
- Workspace 1
- Diesel water heater for showering and climate
- Anssems AMT 2000 ECO Review
- Switching solar panels
- Inverters and their cons
- Preserving electrical contacts
- Labora: What is this project?
- LiFePO4 Battery Know How
- Climate: Insulation and ventilation without serious mistakes
- Labora: Wat is dit project?
- Berekening van draad voor laagspanning en gelijkstroom.
- Labora: Start here
- Cable logistics
- Hoe je een camper-bus wel goed isoleert
By the way, Mettex, UK, can deliver this on a commercial scale. On https://mettex.com/ there is a video which gives you a nice impression of the process.