
From time to time we need a laptop for CAD. A cost effective solution is the Lenovo Ideapad L340-15API with standard 16GB RAM plus a Ryzen 7 GPU. Here is the story and the findings. Only modification is an upgraded M2 unit.
We’re totally impressed by performance, when combined with a desktop screen. The laptop screen itself is far from the very best but okay for incidental use when on the move. The AMD Ryzen 7 performance is absolutely impressive. That, combined with its low price, leaves room for only one conclusion: Highly Recommended!
Table of Contents
Upgrading the NVM
Need more!
256GB is definite not enough when working with virtual machines. The upgrade is an Intel SSD 660p, 1 TB. I try to avoid “SSD” and call it “NVM”: Non Volatile Memory, rather not Solid State Disk. Solid State Device is a not preferred alternative.
Spoiler alert: Where is the 256 GB NVM?
Okay, this is funny, the original 256 GB NVM is simply not there! Then what is? A good old fashioned 2.5″ SSD! And that is good news for an expanding future.
Considerations
Pre-installed Windows is not needed so it is tempting to simply install Xubuntu and go. But I want a way back. On the other hand, for the time being I really don’t need Windows. Playing around with a SystemRescueCd and dd, there is always a way to deal with this in the future. Setting up Grub and things are back to production level. Interim solution: Boot order in UEFI.
Opening the case
Simply remove all screws from the back cover and use a credit card to pry it all open. Take it easy and you won’t damage anything.
Place it all and close it up
Needed: A M2 screw that is not included (M.2, is that a coincidence?). Luckily I always have threaded rods and nuts, so I made it myself, seriously, see the picture, hammered top.

The “BIOS”
Keep the power button pressed for reboot, hit F2 several times, go to the “boot” tab, change order by selecting with cursors and using F5 and F6 to change order:
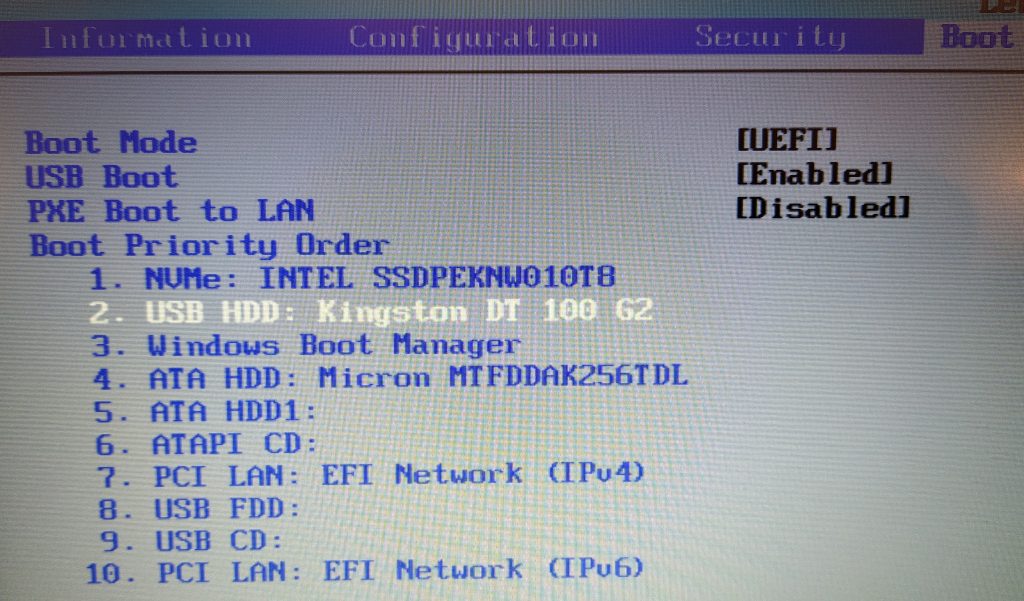
1: Put the new M.2 NVM on top.
2: Boot stick with Xubuntu
3: Stuff on SSD
…
In case you want an extra Linux install later, same procedure but put USB with the image on top then.
Save and reboot (F10) for installing Linux.
All the next steps…
See the start of BricsCAD Linux pages. That will keep you busy for now 😉 But… There are some specific things too:
Lid solution
I hate laptops because of their small working area, phones even more. Luckily I can connect a 40″ 4k screen. But closing the laptop lid turns off the big screen too. How to solve that?
sudo su
nano /etc/systemd/logind.conf
Put the next line at the bottom in logind.conf:
HandleLidSwitch=ignore
ctrl-s and ctrl-x, saving and closing, and then:
service systemd-logind restart
Xubuntu is a bit juggling with screen layouts, do Whisker menu > Settings > Display and drag your laptop screen to the right, make the big display primary. Now you have your menu on the big screen. Don’t mirror he screens when the big screen resolution is different.